Overtime, car headlights get foggy and cloudy after being exposed to wind, sun, rain and overall weather conditions. Because of this, it is important to know how to restore headlights with the right products. Though they are made from a very durable plastic called poly carbonate, this material does not respond well to weathering conditions over a long period of time.
Rain X’s headlight restoration kit is a great product that can be used to restore your headlights to a sparkling and clear condition, so that they look brand new.
The ingredients used in these products have a great restorative reaction with the poly carbonate of the headlights.You can restore your cloudy, foggy headlights on your own with Rain X products, by following the steps outlined below.
You will need:
- The Rain X Headlight Restoration Kit: Rain X’s headlight restoration kit comes with three different grades of sanding pads, a sanding lubricator, a sealant, a headlight restorer and a microfiber cloth.
- Two Dry, Clean Cloth
- Blue Masking Tape (Optional)
Guideline – how to restore headlights with Rain X:
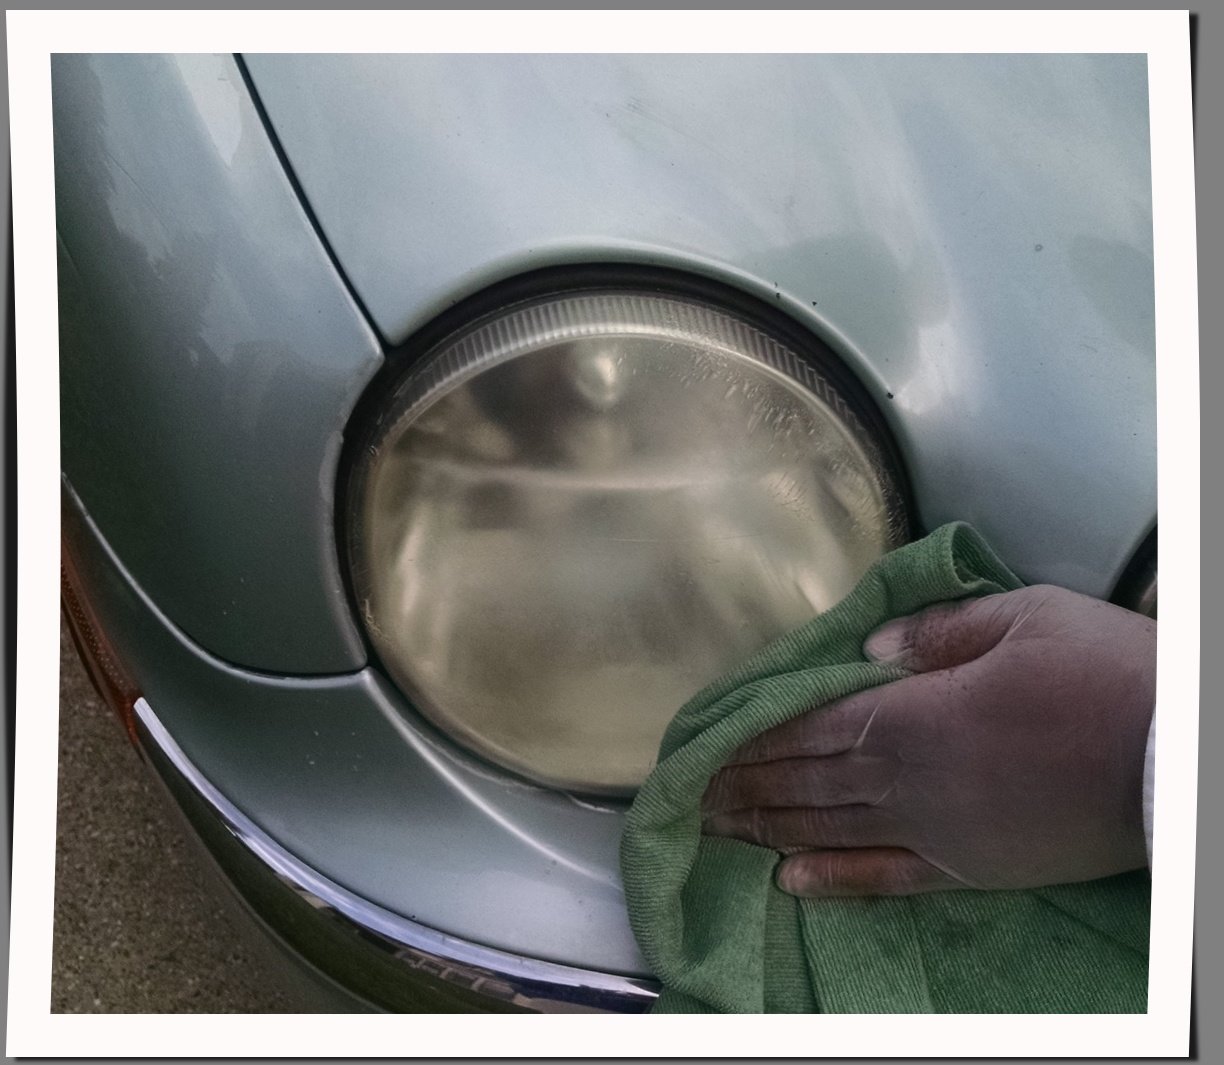
Step 1 – Use the first dry, clean cloth to wipe away any dust, mud or water that might be on your headlights.
Step 2 – Apply the blue masking tape around the perimeter of your headlight.
This is an optional step to help protect the rest of the car material around the headlight, and also helps with precision throughout the restoration process.
Step 3 – Spray the headlight with the sanding lubricant. 
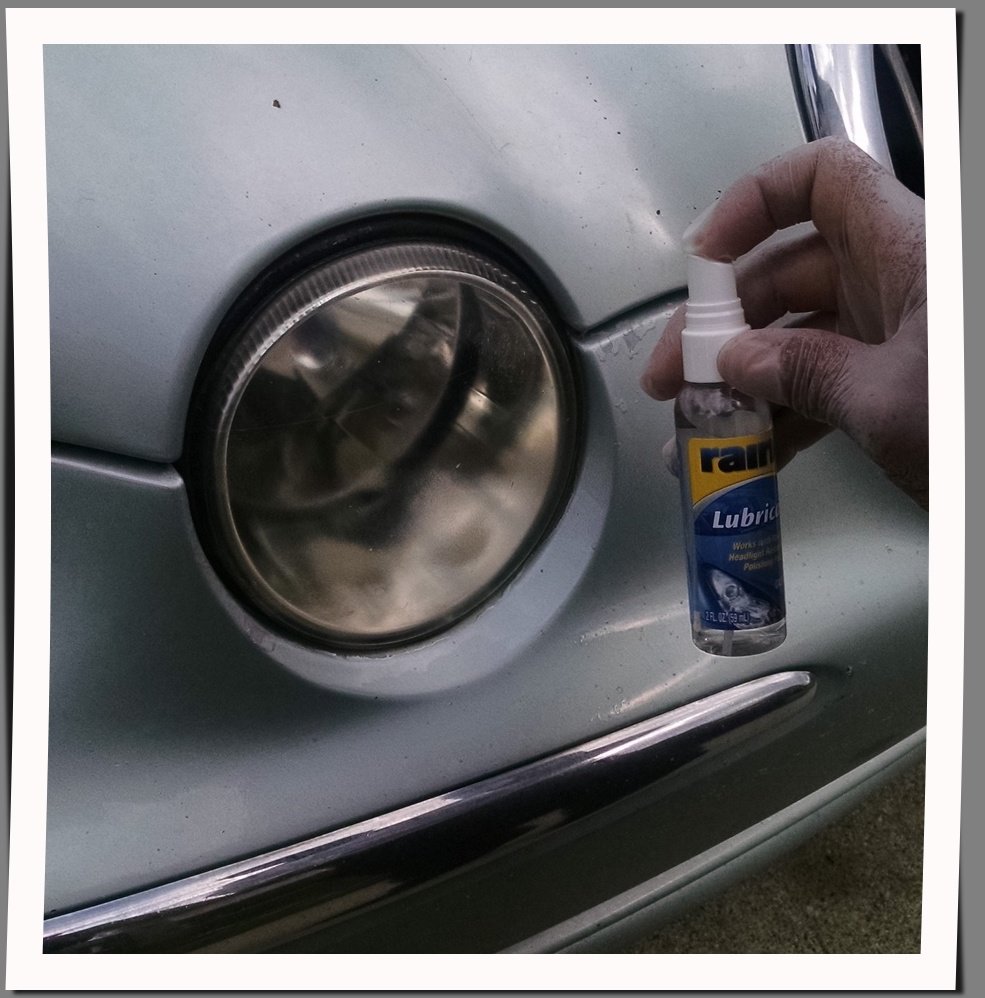
Read the directions on the package of the kit, then start by spraying the headlight with the sanding lubricant. Also spray pad#1 with the lubricant and rub for the recommended amount of time. After doing this, wipe the headlights clean with the microfiber cloth. Prepare to get a little bit of arm exercise from this activity, depending on how much sanding your headlights need.
 Step 4 – Follow the directions in Step 3 above for pad#2, then pad#3.

Ensure that the sanding lubricant is used along with the sanding pads as recommended by the directions given. You don’t want to use too little or too much of this product, as you want to get the best result possible.
Step 5 – Apply a generous amount of the headlight restorer product to the headlights.

Rub in a circular motion until the cloudiness on the headlight has been wiped away.
Step 6 – Wipe the remaining product off with a dry cloth from the headlight.
Then remove the blue tape. Wash and dry the headlight. Apply a small amount of soap to one of the cloths to wash the headlight.

Step 7 – After washing and drying the headlight, spray the headlight with the sealant.
Use a clean cloth to wipe and rub the headlight for a clean, shine and restored finish.
Continue to the other headlight and follow all the steps outlined above.
Now you know how to restore headlights with Rain X, by using their headlight restoration kit. Rain X gives you a professional grade look and the products have received great reviews from customers. If you have ever wonder, ‘do headlight restoration kits work?’, I’m sure that after using this kit, you will be able to answer with a definite ‘yes’.
Schedule an Appointment for Specialty Headlight Detailing
Getting your headlight clean is only one way to get your car looking brand new. For a professional specialty headlight detail and other options, including deep steam cleaning, call and schedule an appointment with a professional car detailing service in your area.