
 The gelcoat (also spelled gel coat) protects your boat’s hull from many elements such as the sun, wind, salt water, dirt, dust and grime. In the process, even with proper maintenance, the gelcoat becomes susceptible to cracks, chips and scratches. These imperfections should be repaired before they can cause serious damage to the hull. Gelcoat crack repair can be done as an easy at-home job or you can get the help of a professional service. Which option will give you better results? Let’s find out.
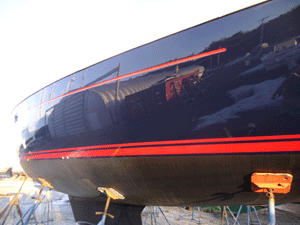
Gelcoat Crack Repair – DIY or Get Professionals?
At Home
Gelcoat crack repair is a pretty easy task. The process involves cleaning the area, wet sanding the crack using medium grit sandpaper and filling the crack with pigmented gelcoat paste. Let it cure completely, then sand the crack again for a smooth finish. Follow by polishing and waxing.
Sanding is the most delicate process of this whole repair job. If not done with proper care, you can sand right through the gelcoat, which will need an expensive repair job. You have to choose a sandpaper with a grit of about 1500.
The most challenging task is getting the gelcoat paste to match the exact color of the existing color of the hull. You will have to mix several trial batches before you can get a shade that is very close. Don’t expect to get the exact color because the gelcoat color will fade considerably due to exposure to different weather conditions. Also new gelcoat changes color once it is cured. So let your trial batches harden (by adding the catalyst) before you decide which color is right. But if your hull is white color, you will be able to do a nearly invisible repair.
Additionally, when spreading the paste over the cracks you have to make sure there are no air bubbles or gaps. Finally, you have to cover the repaired area using plastic film for it to cure completely. You should gather all the necessary information before you try your hand at gelcoat crack repair, especially the dos and dont’s.
Should You Get Professional Help?
There are several advantages to getting professional help for gelcoat crack repair. It is a very time consuming job, so if you are doing a DIY job, prepare to spend a few hours on this. By taking your boat to a professional service, you can avoid this hassle. You can also avoid the dangers that come with inexperienced sanding. Professionals are trained to use sandpaper without damaging the surrounding area or penetrating the surface more than necessary. They will, additionally, do a better job when it comes to getting the gelcoat color right.
The disadvantage of professional gelcoat crack repair is the hefty tag price. Because it takes a few hours, a professional service will charge you by the hour (even up to $100 per hour) or give you a fixed quote (even a small repair will cost you upwards of $100). In contrast, you can get a DIY gelcoat crack repair kit upwards of $25.
If you are up to the task of doing a DIY gelcoat crack repair job, then make sure you read and follow the instructions that come with the repair kit to the letter. You can also get information from reliable sources on the internet. Just as a successful job will save you hundreds of dollars, a poorly-done repair can cost you the same amount. Professionals will be able to do a better, neater job for you because they will pay attention to details that you might miss or you don’t know about.
Enjoyed this post? Sign up for our newsletter to receive more valuable tips, ideas, coupons, and extras!